Technical Rework of Belts, and Global Planning Mode
Overview
This month a few important developments were brought together.
The first of these is that "purpose" was, in a sense, introduced to the game. The October 2025 demo did receive some feedback around players not knowing what to do, even if they understood the game mechanically. This was valid and, to a point, expected. How does one self-actualize as an AI in a game, and how is that reflected mechanically? By adding the global planning mode, we address both, and there are details below.
The second of these was addressing the inherent tension between the tile/voxel based approach taken between the belts, the buildings, and the world. The strongest personification of this being "How do we build a factory on a smooth organic hillside if belts are tiles in a voxel-based space?" After avoiding the topic for too long, the answer, I suspect, is that we can't. Below is an overview of the new (not fully done) spline-based system.
As always, if you find this post interesting, or if you are interested in the game, I would recommend wishlisting it on Steam. It helps a ton.
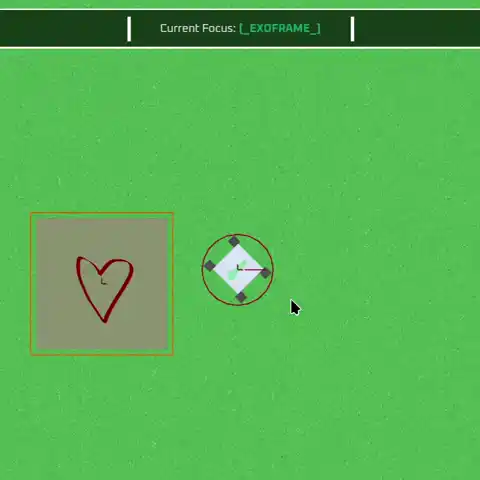
Global Planning Mode
In Exofactory there is the spider web tech "tree" that you grow into based on how you play. But there is also a quality-of-life tree that is climbed as the player ascends the AI's hierarchy of needs.
Global planning mode is the first of those quality-of-life unlocks. It allows the player to place and plan factories in the unconstrained global view mode. Then, after entering an Exoframe, those plans can be quickly turned into real buildings and production chains.
The exact conditions of the "unlock" are a cool story moment that I think is worth experiencing unspoiled. I will say that maintaining access to global planning mode requires, among other things, a consistent 64/min of structural iron be available.
Excited to see people experience this.
Stranger 2.5D Belts in a Strange 3D Land
Exofactory has always had a sort of internal tension between the free-flowing organic world and the internal voxel-based grid system that belts, buildings, and basically everything use. To a degree, I think all factory games suffer from this tension, but with Exofactory, this really was a growing problem that needed to be addressed.
Thought Process
Exofactory initially started as a 2D prototype factory game based around the excellent bevy_ecs_tilemap. As time went on and the game went from 2D prototype to 3D game, a lot of the initial logic was preserved (and, at the time, effort saved) by moving to a voxel-based system.
This works quite well as long as the terrain is flat, or is voxel-based itself, Minecraft-style. The problem was that I didn't want the terrain to be flat or voxel-based.
When playing with even slightly not-flat terrain, things got really bad. In order to have everything fit in the voxel grid, buildings would either float in the air or sink into the ground.
I did consider a few options, namely shrinking the voxel height to be smaller so the effect would be less bad, only having a horizontal grid and no voxels with additional vertical checking code, having dynamic voxel splitting/joining, or a few other frankly worse ideas.
After some tests and reflection, ultimately I decided that any solution around voxels would just be a hack given the game direction.
Going forward, the voxel system will be gradually removed and replaced with more 3D-native approaches, namely Bevy splines, avian3d colliders, sensors, and the like.
Spline Belt Work
The first area where I did this was with the belts, namely because without spline belts, unless the buildings are exactly 1m offset vertically, or on mathematically flawless level ground, they would be impossible to connect.
I took a step-by-step piecewise approach to this.
Step 1 - Most Basic Spline Belt Possible
This is as simple of a spline belt as I could manage. The head of the spline is the first click, the tail is the second. As you move the focus point around, the spline tail snaps to the nearest grid point. I generated a few basic rectangles, then used Bevy's Mesh Builder to "extrude" the mesh along the spline.
At this point everything is just visual. Most of the work here was done around adding the boilerplate for a new building, etc.
Step 2 - Refine Belt Visuals & Geometry
Next up I refined the belt extrusion profiles to match the profile of the old tile-based belts and added some special belt head/tail logic so we don't just have square ends. I wanted to use the unmodified textures from the old belt, so matching the geometry was necessary.
Being better with FreeCAD than I am with Blender, I actually opened the old belt glb file in FreeCAD, took a cross section, and used the FreeCAD measurement tools to get the dimensions.
I modified the old shader I used with the old belts to get the belt surface working correctly and began work on the belt rail texture. I need a bit of clarification on the belt rail texture, so that is yet to be done. For now we have default gray rails.
The geometry is where it gets interesting. I wanted the default Exofactory belt to be one that looks clean when you place a lot of them together. Visual satisfaction is the goal. The case I tested against is that if you have 12 belts placed on a platform above the ground, you should be able to extend them through a 90-degree turn while descending in a clean way. They should all line up next to each other in a predictable pattern with no clipping. Happy with what I have here.
Technically speaking, horizontally, the belt is a cardinal X/Z route with a clamped Hermite quarter-turn and a minimum bend radius. Vertically, it is a smoothstep ramp layered on after route construction.
The final meshes are produced by sweeping a 2D cross-section along the spline through the 2D profiles.
At this point the belt is looking a lot better but is still just visual.
Step 3 - Making the Belt Do Belting
Here major work was done. The good news is that I could reuse many of the components (with their corresponding logic) that were used by the old tile belt chain system.
Ironically enough, this was a VAST simplification. No longer do I have to worry about placing chains of belts, splitting or merging chains, updating the motion spline of items across many chains, or keeping those motion splines in sync with the underlying (rather complicated and full of relationships) chain component mappings.
Now each Belt has a single authoritative spline that everything is deterministically driven from, including item motion across the belt. Between that and a few other basic spline belt components, things are much easier to maintain and debug.
I did need to do some refactoring around building inputs and outputs, which had used voxel-based logic to check for valid connections. While in buildings, they still use voxel logic to determine where input and output ports are and how they should be oriented, actual connections are checked via a combination of avian sensors and component checking. Once the connection code marks a valid connection, we build a relationship that makes placing and removing things from the belts performant and ergonomically simple from a coding perspective.
Belt cost went through a minor rework. Instead of costing one iron per belt tile, belts cost 1 iron per meter rounded up. Same with checking belt capacity, but rounded down.
After adding a few things like maximum allowed belt build length and maximum belt grade, we have a working replacement for the old tile-based belts.
Removing the old belt tile system was very satisfying, to say the least, after this.
Work to Be Done
The spline-based belt system is working, but it isn't fully done yet. At least I want to:
- Use the actual texture for the belt rails. Simple in theory, but annoying to do cleanly.
- Add belt supports. Right now the belts just float. I suspect this won't be toooo bad. I just need to do a bit of design work.
Conclusion
Really happy with finally addressing the internal 2.5D/3D tension of the game. I have been stalling on fixing it for too long.
Also super happy to have my first cool in-game story element fully coded out. Feels weird to not give all the details.
Regardless, not a bad month. And once again, if you found this enjoyable, informative, or just like the game, I would suggest giving the game a wishlist.